How to Add TextField Label in Android Jetpack Compose
TextFields are indispensable UI elements when you’re developing Android apps. They offer a way for users to enter data, and labels make these TextFields even more user-friendly.
Labels help users understand what type of input is expected. In this tutorial, you’ll learn how to add a label to a TextField in Android Jetpack Compose.
Why Labels Are Important
Before diving into the code, it’s important to understand why labels matter. Labels guide users through your app. They make the interface more intuitive. Without them, users might get confused about what they’re supposed to enter in a text field.
Use The label Parameter
In an earlier blog post, we discussed how to add placeholder text to a TextField by using the placeholder parameter. However, for adding a label, we’ll use the label parameter. Below is a simple code snippet that demonstrates this.
@Composable
fun TextFieldExample() {
var textInput by remember { mutableStateOf("")}
TextField(value = textInput, onValueChange = {textInput = it},
label = { Text("Username") },
modifier = Modifier
.fillMaxWidth()
.padding(10.dp))
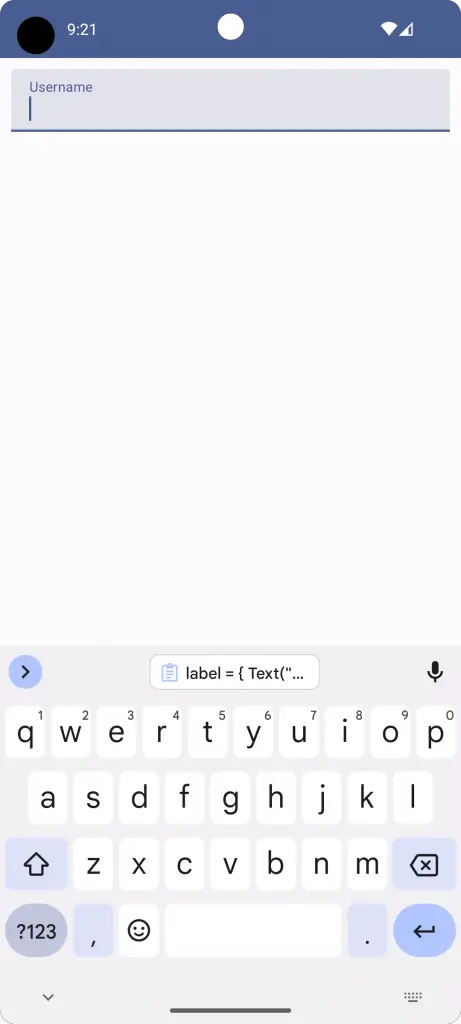
}Here, the text “Username” will be displayed as a label above the TextField.
Complete Code Example
Let’s move on to a complete example that you can run and test. In this example, we will be creating a TextField with a label inside a MainActivity.
package com.codingwithrashid.myapplication

import android.os.Bundle
import androidx.activity.ComponentActivity
import androidx.activity.compose.setContent
import androidx.compose.foundation.layout.Column
import androidx.compose.foundation.layout.fillMaxSize
import androidx.compose.foundation.layout.fillMaxWidth
import androidx.compose.foundation.layout.padding
import androidx.compose.material3.ExperimentalMaterial3Api
import androidx.compose.material3.MaterialTheme
import androidx.compose.material3.Surface
import androidx.compose.material3.Text
import androidx.compose.material3.TextField
import androidx.compose.runtime.Composable
import androidx.compose.runtime.getValue
import androidx.compose.runtime.mutableStateOf
import androidx.compose.runtime.remember
import androidx.compose.runtime.setValue
import androidx.compose.ui.Modifier
import androidx.compose.ui.unit.dp
import com.codingwithrashid.myapplication.ui.theme.MyApplicationTheme

class MainActivity : ComponentActivity() {
    override fun onCreate(savedInstanceState: Bundle?) {
        super.onCreate(savedInstanceState)
        setContent {
            MyApplicationTheme {
                Surface(
                    modifier = Modifier.fillMaxSize(),
                    color = MaterialTheme.colorScheme.background
                ) {
                    Column {
                        TextFieldExample()
                    }
                }
            }
        }
    }
}

@OptIn(ExperimentalMaterial3Api::class)
@Composable
fun TextFieldExample() {
        var textInput by remember { mutableStateOf("")}
        TextField(value = textInput, onValueChange = {textInput = it},
            label = { Text("Username") },
            modifier = Modifier
                .fillMaxWidth()
                .padding(10.dp))
}
The Result
Run the code, and you’ll see a TextField with the label “Username.” This makes it clear what the TextField is for, improving user experience.
Adding a label to a TextField in Android Jetpack Compose is easy but essential for creating a good user interface. By following this tutorial, you can make your app more user-friendly and intuitive.


One Comment