How to Arrange Elements Vertically in Android Jetpack Compose
Jetpack Compose provides a new way to design the UI of your Android app. It’s effortless and effective to create UI elements with composable functions. In this Android tutorial, let’s check how to arrange your UI elements vertically using Jetpack composable functions.
It’s straightforward. You just need to use Column composable and wrap it around the components you want to get vertically arranged. See the code snippet given below.
@Composable
fun ColumnExample() {
    Column {
        Text(text = "Hello")
        Text(text = "World!")
    }
}
In this example, we have two Text components that will be arranged vertically. The result is a column with the text “Hello” above the text “World!”.

But what if we want to add more elements to the column? We can simply add them as additional child components.
@Composable
fun ColumnExample() {
    Column {
        Text(text = "Hello")
        Text(text = "World!")
        Button(onClick = { /* Do something */ }) {
            Text(text = "Click me!")
        }
    }
}
In this example, we’ve added a Button component to the column. The result is a column with the text “Hello” above the text “World!” and a button below them.

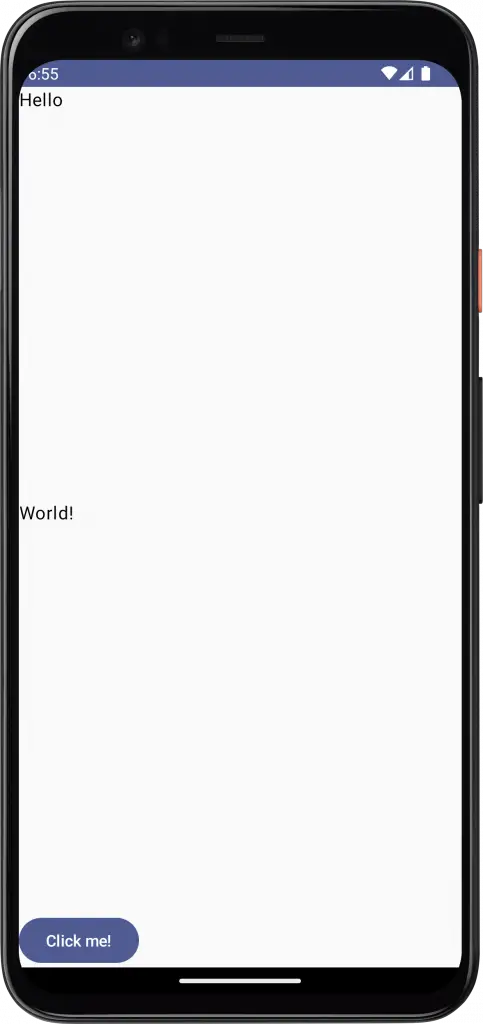
If we want to add spacing between the elements in the column, we can use the verticalArrangement parameter and apply Arrangement.SpaceBetween.
@Composable
fun ColumnExample() {
    Column(modifier = Modifier.fillMaxHeight(),
    verticalArrangement = Arrangement.SpaceBetween) {
        Text(text = "Hello")
        Text(text = "World!")
        Button(onClick = { /* Do something */ }) {
            Text(text = "Click me!")
        }
    }
}
Then you will get the following output.
Following is the complete code for reference.
package com.example.myapplication

import android.os.Bundle
import androidx.activity.ComponentActivity
import androidx.activity.compose.setContent
import androidx.compose.foundation.layout.*
import androidx.compose.material3.Button
import androidx.compose.material3.MaterialTheme
import androidx.compose.material3.Surface
import androidx.compose.material3.Text
import androidx.compose.runtime.*
import androidx.compose.ui.Modifier
import androidx.compose.ui.tooling.preview.Preview
import com.example.myapplication.ui.theme.MyApplicationTheme

class MainActivity : ComponentActivity() {
    override fun onCreate(savedInstanceState: Bundle?) {
        super.onCreate(savedInstanceState)
        setContent {
            MyApplicationTheme {
                Surface(
                    modifier = Modifier.fillMaxSize(),
                    color = MaterialTheme.colorScheme.background
                ) {
                    ColumnExample()
                }
            }
        }
    }
}

@Composable
fun ColumnExample() {
    Column(modifier = Modifier.fillMaxHeight(),
    verticalArrangement = Arrangement.SpaceBetween) {
        Text(text = "Hello")
        Text(text = "World!")
        Button(onClick = { /* Do something */ }) {
            Text(text = "Click me!")
        }
    }
}

@Preview(showBackground = true)
@Composable
fun DefaultPreview() {
    MyApplicationTheme {
        ColumnExample()
    }
}
If you want to arrange your UI elements horizontally then you can use the Row composable.
In this blog post, we’ve explored how to arrange elements vertically using Jetpack Compose. By using the Column component, we can easily create responsive, vertical layouts with less code than traditional XML layouts.


One Comment