How to Add Image Borders in iOS SwiftUI
In this blog post, we are focusing on an aspect of enhancing your app’s visual appeal – adding borders to images in SwiftUI. Not only do borders accentuate your images, but they also significantly contribute to the overall design language of your app.
Basics: Create an Image Border
In SwiftUI, adding a border to an image is made easy by the .overlay() modifier used in conjunction with shapes such as Rectangle() or RoundedRectangle(). Here’s a simple example:
Image("dog")
    .resizable()
    .aspectRatio(contentMode: .fit)
    .overlay(
        Rectangle()
            .stroke(Color.blue, lineWidth: 3)
    )
In this code snippet, we have an image with the identifier “dog”. The image is made resizable and set to maintain its aspect ratio. Then, using the .overlay() modifier, a rectangular border with a blue color and a line width of 3 points is added.
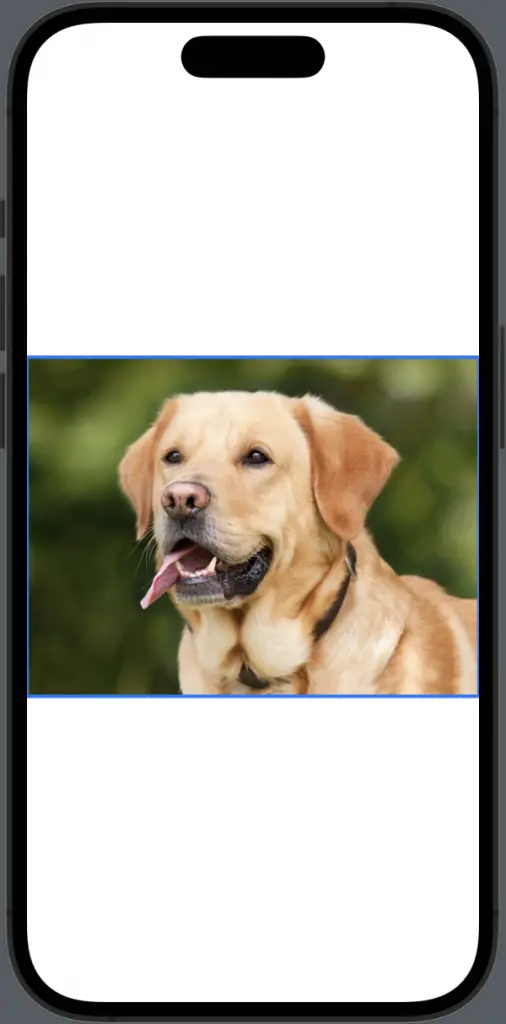
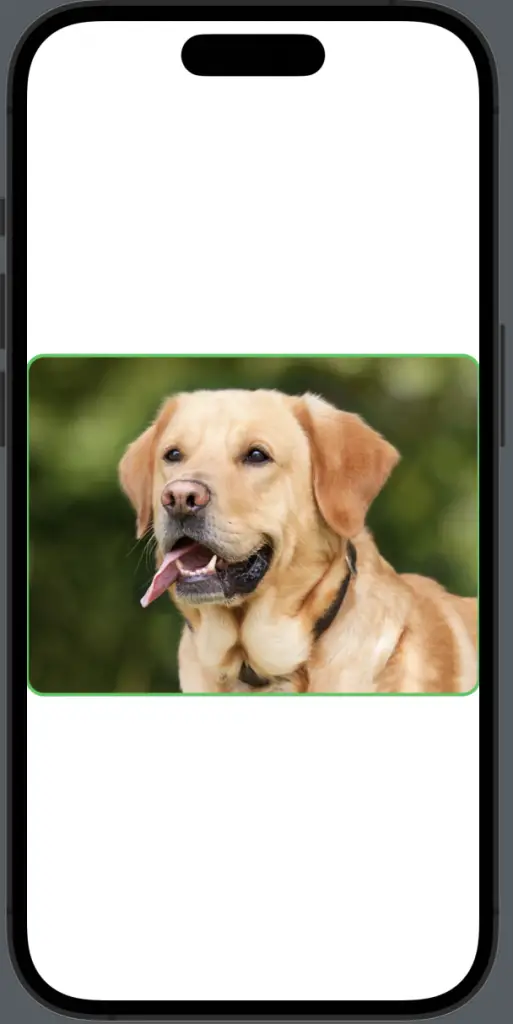
Image with Rounded Borders
For a more modern and softer look, you might want to give your image border rounded corners. SwiftUI allows you to do this effortlessly by using RoundedRectangle() instead of Rectangle():
Image("dog")
    .resizable()
    .aspectRatio(contentMode: .fit)
    .clipShape(RoundedRectangle(cornerRadius: 15))
    .overlay(
        RoundedRectangle(cornerRadius: 15)
            .stroke(Color.green, lineWidth: 3)
    )
In this example, .clipShape(RoundedRectangle(cornerRadius: 15)) is used to give the image itself rounded corners. Then the .overlay() modifier is used to add the border, which will also be rounded and align nicely with the rounded corners of the image.
Adding borders to images in SwiftUI provides an effortless way to enhance the visual appeal of your app and guide users’ attention to key visuals. With SwiftUI’s intuitive and powerful toolset, you can create stunning image borders with just a few lines of code.