How to Create Dropdown Menu Using Picker in iOS SwiftUI
Dropdown menus are a staple in user interfaces, allowing users to choose from multiple options without taking up too much screen space. In SwiftUI, the Picker element serves this purpose effectively. In this blog post, we’ll explore how to create a dropdown menu using Picker in SwiftUI.
Basic Picker Example
First, let’s start with a simple example to demonstrate a basic Picker:
import SwiftUI

struct ContentView: View {
    @State private var selectedFruit = "Apple"
    let fruits = ["Apple", "Banana", "Cherry"]

    var body: some View {
        Picker("Select a fruit", selection: $selectedFruit) {
            ForEach(fruits, id: \.self) {
                Text($0)
            }
        }
    }
}
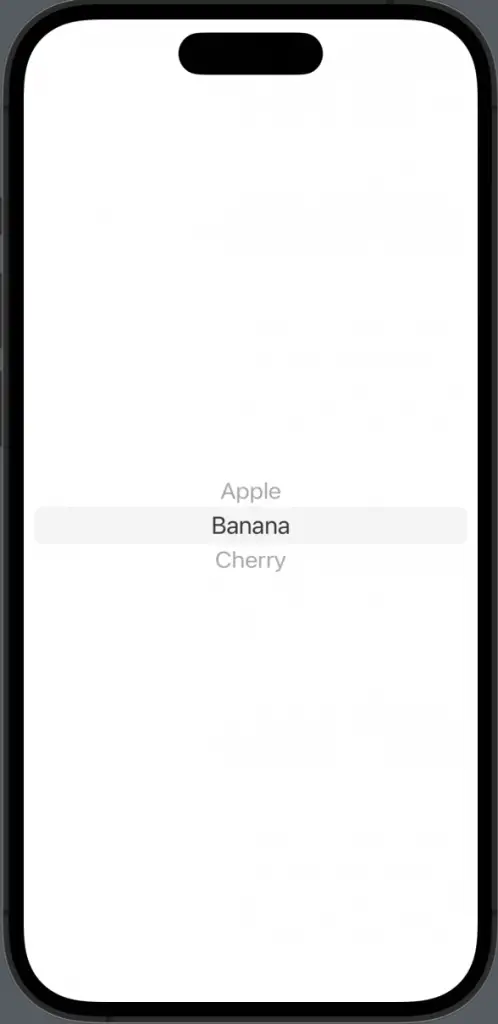
This example shows a picker that lets you select a fruit from a list.

Dropdown Style
To make it look like a dropdown, you can apply the .pickerStyle modifier:
import SwiftUI

struct ContentView: View {
    @State private var selectedFruit = "Apple"
    let fruits = ["Apple", "Banana", "Cherry"]

    var body: some View {
        Picker("Select a fruit", selection: $selectedFruit) {
            ForEach(fruits, id: \.self) {
                Text($0)
            }
        }.pickerStyle(.wheel)
    }
}
This changes the picker to a dropdown-style menu.

Dynamic Data
What if you have dynamic data? You can use the ForEach loop inside the Picker to iterate through an array:
ForEach(fruits, id: \.self) {
    Text($0)
}
This will dynamically create picker items based on the fruits array.
Handling Selection
To handle the selected value, use a @State variable. In our example, selectedFruit holds the selected value, and it’s bound to the Picker:
@State private var selectedFruit = "Apple"Creating a dropdown menu in SwiftUI is straightforward with the Picker element. You can customize it to fit your needs, whether you want to change its appearance or handle dynamic data. The Picker is a versatile component that can be adapted for various use cases.


One Comment