How to Add Border to ZStack in SwiftUI
SwiftUI has brought about a revolution in how we design iOS apps. Among the various layout containers SwiftUI provides, ZStack is quite unique. In this blog post, we’re going to learn how to create borders for ZStacks in SwiftUI.
ZStack Overview
A ZStack in SwiftUI is a simple yet powerful container view that arranges its child views along the Z-axis. Instead of arranging views side by side or one below the other, it stacks them on top of each other. This feature of stacking views is handy when you want to create layered interfaces.
Add Border to ZStack
Creating a border around ZStack involves using the .border view modifier. Let’s see how it’s done.
Step 1: Create a ZStack
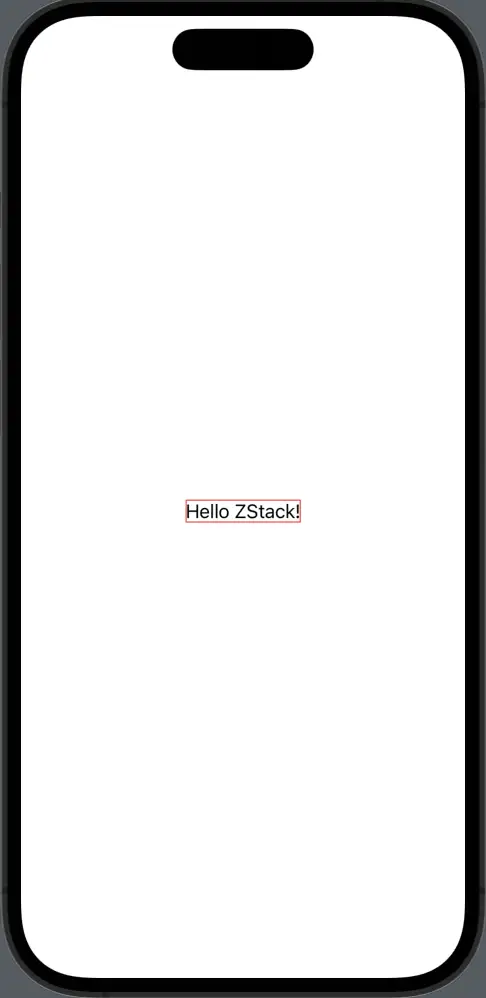
First, you need to create a ZStack. Here, we’re adding a Text view as the child.
ZStack {
  Text("Hello ZStack!")
}
Step 2: Apply .border Modifier
Now it’s time to add a border to our ZStack. We can do this using the .border view modifier.
ZStack {
  Text("Hello ZStack!")
}.border(Color.red)
This will create a red border on your ZStack.
Control the Border’s Appearance
The .border modifier is flexible and allows you to change the color and width of your border.
For instance, if you want a wider green border, you can adjust the color and width values like so:
ZStack {
  Text("Hello ZStack!")
}.border(Color.green, width: 2)
In SwiftUI, adding a border to ZStack is easy and straightforward. By using the .border view modifier, you can customize the appearance of your borders, giving you the freedom to create attractive and engaging user interfaces.