How to Create VStack with Rounded Border in iOS SwiftUI
Building a user-friendly and appealing interface requires a deep understanding of SwiftUI components, one of which is VStack. An often sought-after design element is a rounded border around these stacks. Today, we’ll learn how to add a rounded border to VStack in SwiftUI.
Understanding VStack
VStack, a SwiftUI stack, organizes its children vertically. It is useful for creating sleek and uncluttered interfaces. Now, let’s look at how to add a touch of elegance with a rounded border.
Create a VStack with Rounded Border
Adding a rounded border to your VStack enhances the aesthetics of your app, and it’s pretty straightforward.
Step 1: Create a VStack
First, start by creating a VStack. Add a few Text views for simplicity.
VStack {
  Text("This is VStack")
  Text("With Rounded Border")
}
Step 2: Add the Rounded Border
Next, you need to use the .overlay and .clipShape modifiers to add a rounded border. The .overlay modifier lets you place a view, like a border, on top of VStack. The .clipShape modifier, on the other hand, rounds off the corners.
VStack {
  Text("This is VStack")
  Text("With Rounded Border")
}
.padding()
.overlay(
  RoundedRectangle(cornerRadius: 20)
    .stroke(Color.blue, lineWidth: 4)
)
Here, the RoundedRectangle’s cornerRadius parameter is 20, making the corners nicely rounded. The .stroke function adds a blue border with a width of 4.
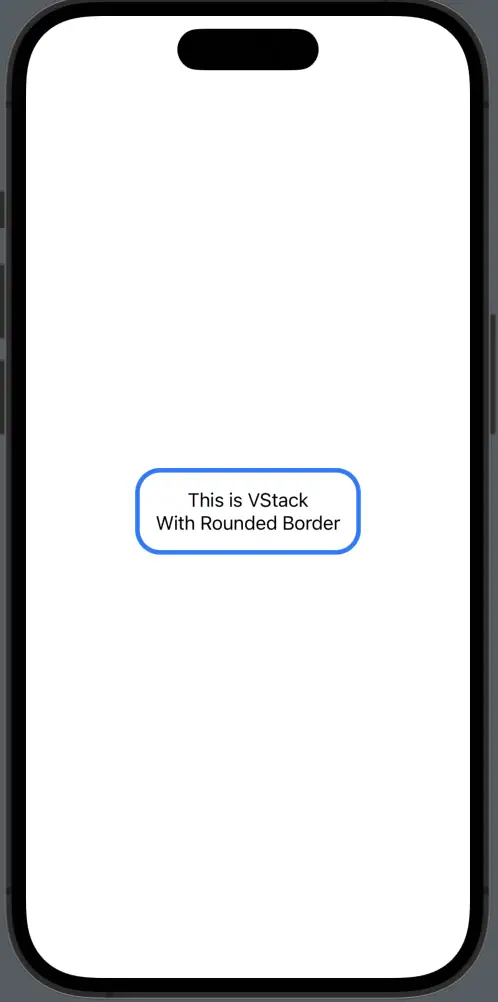
VStack in SwiftUI is not just for aligning views vertically. With the right modifiers, you can add visually appealing details like a rounded border. Understanding this technique can take your SwiftUI user interface design to the next level.
