How to Create Diamond Shape in SwiftUI
When it comes to custom UI design in SwiftUI, the ability to create your own shapes opens up a realm of possibilities. A diamond shape, for instance, can add a touch of sophistication and visual interest to your app
Here’s a detailed guide on how to craft a diamond shape using SwiftUI’s powerful and intuitive framework.
SwiftUI’s drawing tools allow you to craft shapes that are as unique as your app’s design needs. By defining a structure that conforms to the Shape protocol, you create the blueprint for your shape. It involves specifying a path that SwiftUI can draw.
Design a Diamond Shape
To create a diamond shape, you will define a struct that adopts the Shape protocol. This protocol requires you to implement the path(in:) function, which uses a Path object to plot out the shape’s design.
Here’s how you can create a struct for a diamond shape:
struct Diamond: Shape {
    func path(in rect: CGRect) -> Path {
        var path = Path()

        // The diamond is essentially a rotated square.
        // We start by moving to the top center point.
        path.move(to: CGPoint(x: rect.midX, y: rect.minY))

        // Draw lines to each corner of the diamond.
        path.addLine(to: CGPoint(x: rect.maxX, y: rect.midY))
        path.addLine(to: CGPoint(x: rect.midX, y: rect.maxY))
        path.addLine(to: CGPoint(x: rect.minX, y: rect.midY))

        // Complete the diamond by closing the path.
        path.closeSubpath()

        return path
    }
}
The Diamond struct’s path(in:) method begins at the top center of the provided rectangle and draws lines to each corner, forming a diamond shape. The closeSubpath() function seals the path, ensuring the shape is complete.
Implement the Diamond Shape in SwiftUI
Once you’ve defined the diamond shape, you can use it within a SwiftUI view just like any other built-in shape.
struct ContentView: View {
    var body: some View {
        Diamond()
            .fill(Color.blue)
            .frame(width: 200, height: 200)
            .shadow(radius: 10)
    }
}
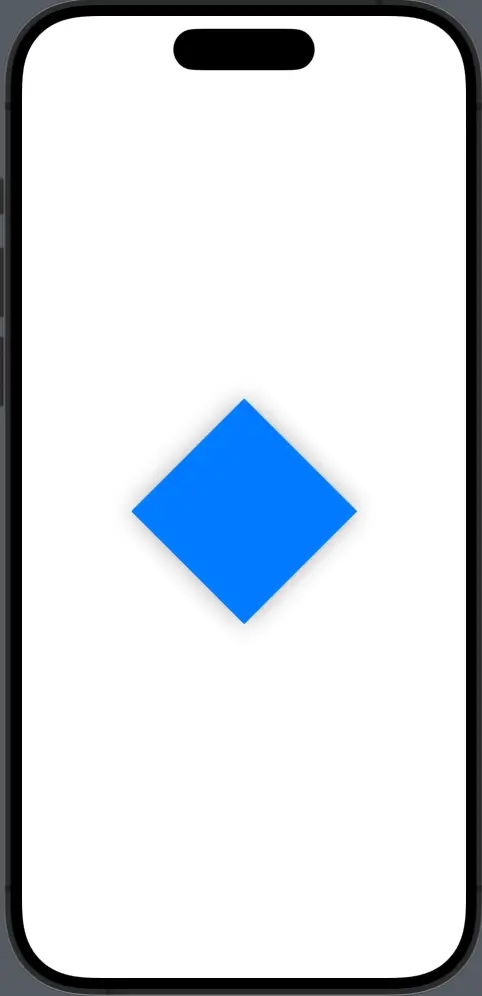
In the ContentView, a Diamond shape is filled with blue, given a frame, and provided with a shadow for depth. The frame modifier sets the size of the diamond, and the fill modifier applies the color.
Following is the complete code for reference.
import SwiftUI

struct ContentView: View {
    var body: some View {
        Diamond()
                    .fill(Color.blue)
                    .frame(width: 200, height: 200)
                    .shadow(radius: 10)
    }
}

struct Diamond: Shape {
    func path(in rect: CGRect) -> Path {
        var path = Path()

        // The diamond is essentially a rotated square.
        // We start by moving to the top center point.
        path.move(to: CGPoint(x: rect.midX, y: rect.minY))

        // Draw lines to each corner of the diamond.
        path.addLine(to: CGPoint(x: rect.maxX, y: rect.midY))
        path.addLine(to: CGPoint(x: rect.midX, y: rect.maxY))
        path.addLine(to: CGPoint(x: rect.minX, y: rect.midY))

        // Complete the diamond by closing the path.
        path.closeSubpath()

        return path
    }
}

struct ContentView_Previews: PreviewProvider {
    static var previews: some View {
        ContentView()
    }
}
Customize Your Diamond Shape
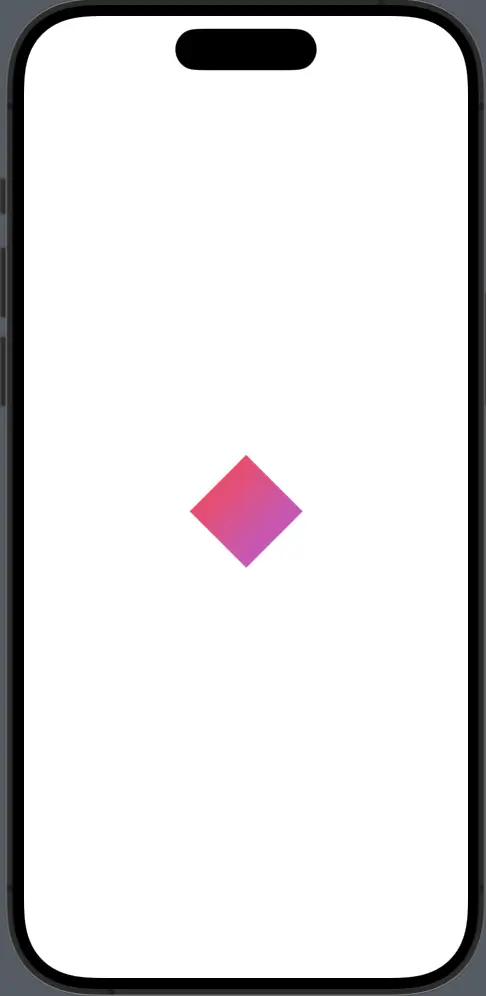
SwiftUI lets you style shapes with gradients, borders, and more. For a more striking look, you can apply a gradient fill to your diamond.
Diamond()
    .fill(LinearGradient(gradient: Gradient(colors: [Color.red, Color.purple]), startPoint: .topLeading, endPoint: .bottomTrailing))
    .frame(width: 300, height: 300)
Here, a LinearGradient is applied to the Diamond, creating a color transition from red to purple.
Creating a custom diamond shape in SwiftUI is a testament to the framework’s adaptability and ease of use. With just a few lines of code, you can draw a shape that’s tailored to your app’s theme and purpose.
You can further enhance the diamond’s appearance with shadows, gradients, and animations to ensure that it stands out on the screen.
By integrating custom shapes like the diamond into your SwiftUI app, you’re able to craft an experience that’s both visually captivating and uniquely branded to your app’s identity.
