How to Add Date Picker in Flutter
The date picker is an important component when you have text fields such as sign-up form in your mobile application. It can be used for picking dates, such as date of birth. In this blog post, I am explaining how to add a date picker in Flutter.
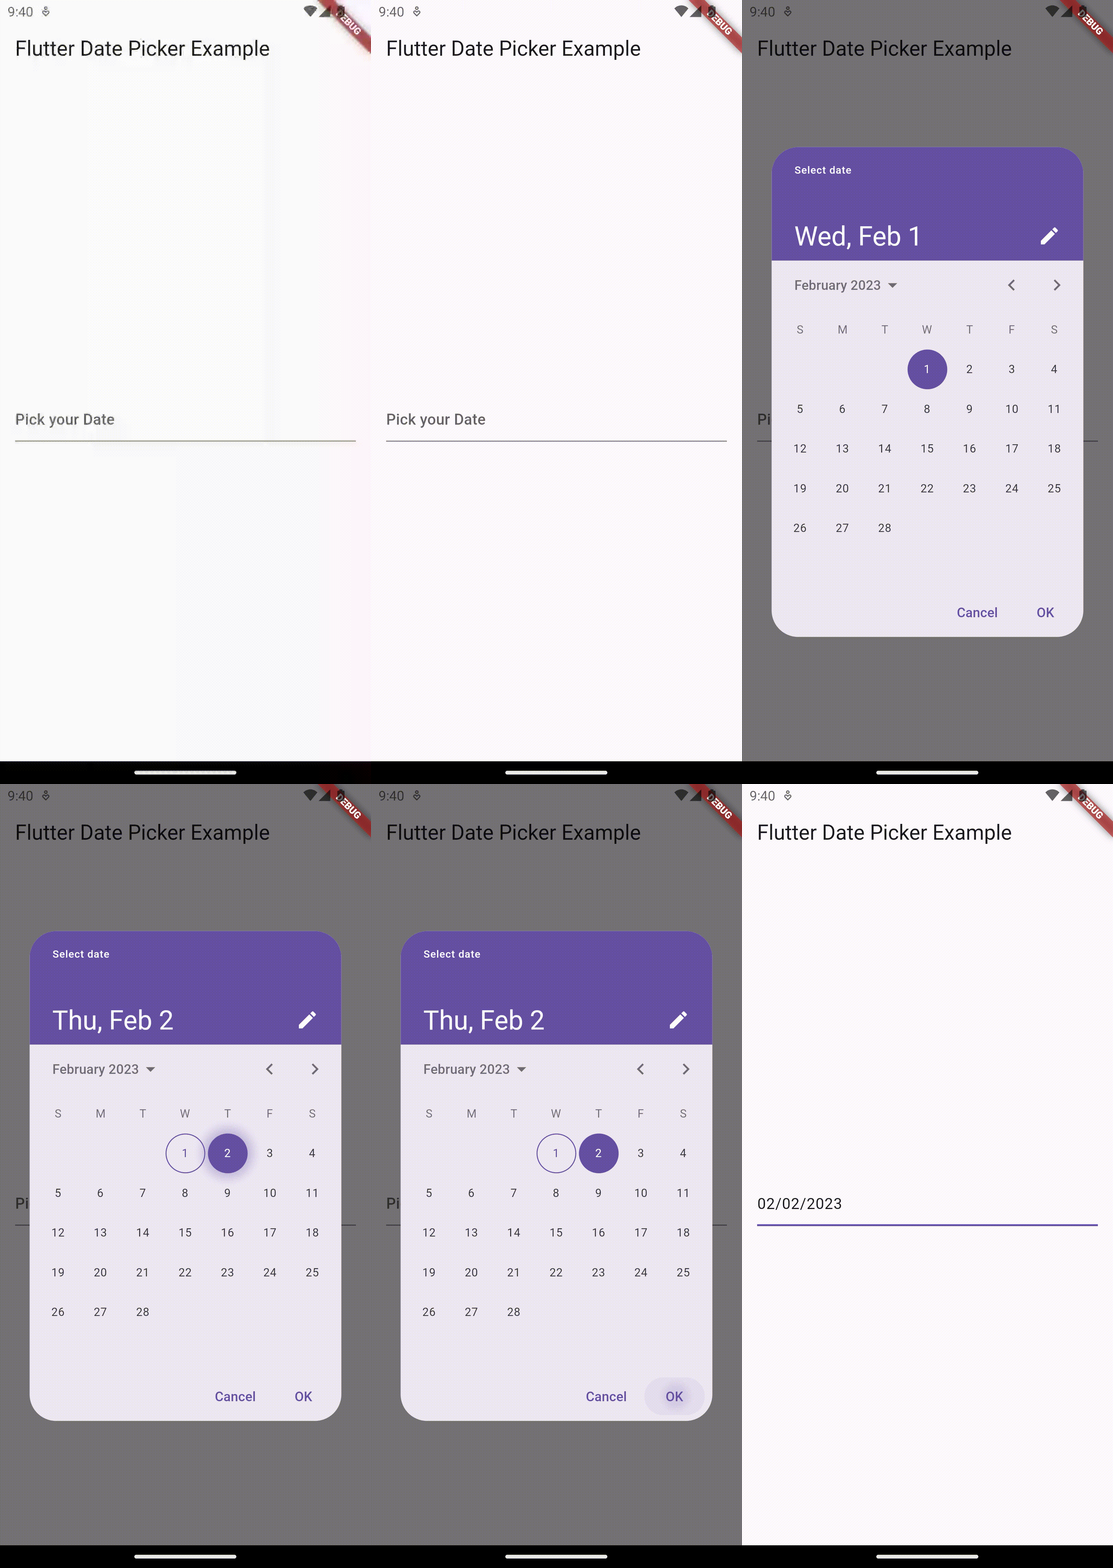
If you don’t know how to add TextField in Flutter then please go through this blog post before proceeding. In this flutter date picker example, I am using a TextField widget. When the TextField is tapped date picker will get opened and show the selected date in the TextField.
The following function opens the date picker and returns the selected date.
showDatePicker(
              context: context,
              initialDate:DateTime.now(),
              firstDate:DateTime(1900),
              lastDate: DateTime(2100));
We have to pass this function to the onTap attribute of TextField widget. Thus the date picker appears when the user taps the text input. The attribute readOnly is set as true so that the user doesn’t modify the value using the keyboard. When the date is selected we show the date in TextField using the textfield controller.
I also recommend you install the intl package into your Flutter project so that you can format the selected date easily.
Following is the complete flutter example of showing the date picker when the textfield is clicked.
import 'package:flutter/material.dart';
import 'package:intl/intl.dart';

void main() => runApp(const MyApp());

class MyApp extends StatelessWidget {
  const MyApp({super.key});

  @override
  Widget build(BuildContext context) {
    return MaterialApp(
        title: 'Flutter Demo',
        theme: ThemeData(
          useMaterial3: true,
        ),
        home: const MyStatefulWidget());
  }
}

class MyStatefulWidget extends StatefulWidget {
  const MyStatefulWidget({super.key});

  @override
  State<MyStatefulWidget> createState() => _MyStatefulWidgetState();
}

class _MyStatefulWidgetState extends State<MyStatefulWidget> {
  final dateController = TextEditingController();

  @override
  void dispose() {
    // Clean up the controller when the widget is removed
    dateController.dispose();
    super.dispose();
  }

  @override
  Widget build(BuildContext context) {
    return Scaffold(
        appBar: AppBar(
          title: const Text('Flutter Date Picker Example'),
        ),
        body: Padding(
            padding: const EdgeInsets.all(16.0),
            child: Center(
                child: TextField(
              readOnly: true,
              controller: dateController,
              decoration: const InputDecoration(hintText: 'Pick your Date'),
              onTap: () async {
                var date = await showDatePicker(
                    context: context,
                    initialDate: DateTime.now(),
                    firstDate: DateTime(1900),
                    lastDate: DateTime(2100));
                if (date != null) {
                  dateController.text = DateFormat('MM/dd/yyyy').format(date);
                }
              },
            ))));
  }
}
Following is the output of the Flutter date picker example.

I hope this flutter tutorial will help you. Stay tuned for more flutter tutorials and examples.
2 Comments