How to Change TextField Cursor Color in iOS SwiftUI
One of the critical aspects of UI design is ensuring that elements align with the theme of the application. Even small details like the cursor color in a text field can make a big difference in user experience. SwiftUI’s TextField allows for easy customization, including changing the cursor color.
This blog post will guide you through the process of setting a custom cursor color in SwiftUI using a simple example.
Change Cursor Color with SwiftUI
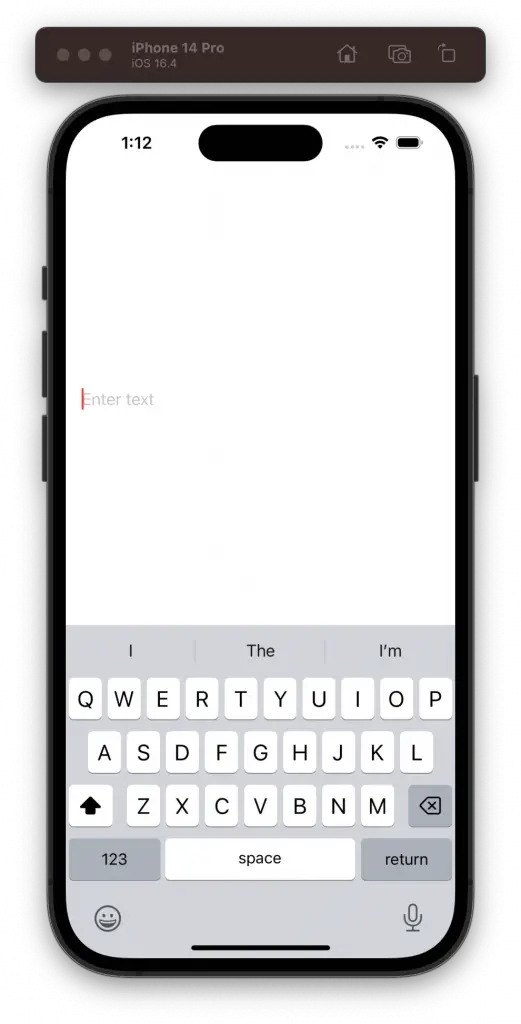
Starting from iOS 15, SwiftUI introduced the tint modifier, which enables changing the cursor color in a text field. Here’s an example to demonstrate how it’s done:
struct ContentView: View {
    @State private var text = ""

    var body: some View {
        TextField("Enter text", text: $text)
            .padding()
            .tint(Color.red)
    }
}
In the code snippet above, the tint modifier is used to set the cursor color to red.
How It Works
- @State Property: The
@Stateproperty wrapper is used to store the text entered by the user in the TextField. It allows the SwiftUI view to re-render when the text changes. - TextField: The TextField is set up with a placeholder “Enter text” and is bound to the
textstate variable. As the user types, the text state variable is updated. - Padding: Padding is added to provide some space around the TextField, making it look nice within the layout.
- Tint: Finally, the
tintmodifier is used to change the cursor color. It accepts a color, and in this example, the color red is used.

Customizing cursor color in a TextField is a subtle yet essential aspect of app design, aiding in creating a consistent visual theme. SwiftUI makes this customization easy and intuitive. By employing the tint modifier, developers can effortlessly align the cursor color with their app’s overall appearance.


