How to Change TextField Border Radius in iOS SwiftUI
Designing a text field with a rounded border can significantly enhance the aesthetic appeal of your app’s UI. In SwiftUI, you can effortlessly add a border with a specific radius to a TextField, allowing for a sleek and modern design.
This blog post will walk you through the process, explaining how to create a TextField with a border radius in SwiftUI.
Example of SwiftUI TextField with Border Radius
Here’s an example to illustrate how to create a TextField with a rounded border:
struct ContentView: View {
    @State private var text = ""

    var body: some View {
        TextField("Enter text", text: $text)
            .padding()
            .overlay(
                RoundedRectangle(cornerRadius: 15)
                    .stroke(Color.blue, lineWidth: 2)
            ).padding()
    }
}
Breakdown of the Code
1. @State Property Wrapper
The @State property wrapper is used to declare a private variable called text. This variable holds the text entered by the user and causes the view to update when the text changes.
2. TextField
The TextField is constructed with a placeholder "Enter text" and is bound to the text state variable.
3. padding Modifier
Padding is applied to give space around the TextField. This padding ensures that the border does not overlap with the text content.
4. overlay Modifier
The overlay modifier is used to draw the rounded border around the TextField. Inside the overlay, the RoundedRectangle shape is defined with a cornerRadius of 15, which sets the radius of the corners.
5. stroke Modifier
The stroke modifier is applied to the RoundedRectangle to set the color and line width of the border. In this example, the border color is blue, and the line width is 2.
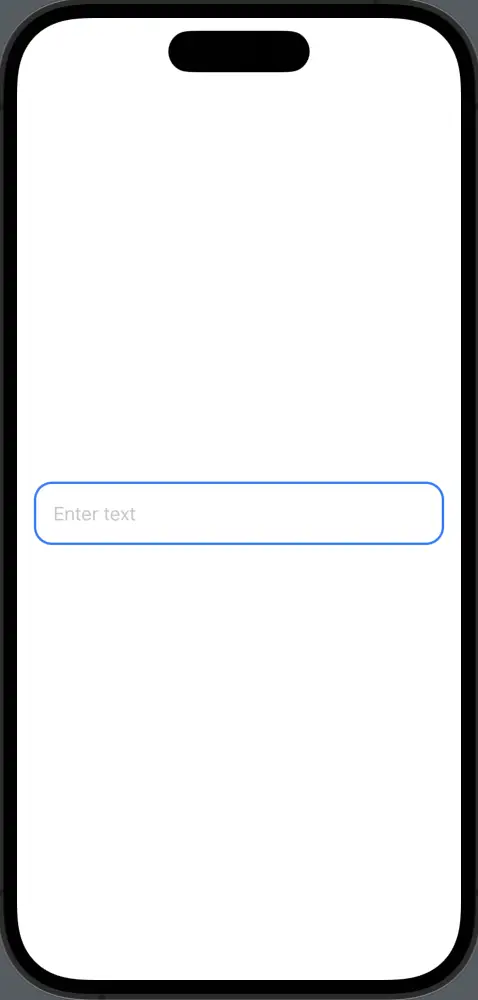
Creating a TextField with a rounded border in SwiftUI is both straightforward and powerful, thanks to the flexibility provided by modifiers such as overlay, RoundedRectangle, and cornerRadius.
By understanding and applying these concepts, you can enhance the visual appeal of text fields in your app, contributing to a more engaging and enjoyable user experience.
