How to Create Navigation Drawer in Flutter
Navigation Drawers are one of the primary options of navigation, especially if you are using material design in your mobile app. In this blog post, let’s check how to create a navigation drawer in Flutter.
Basically, you can create a navigation drawer in three steps:
- Add a drawer using a Scaffold widget.
- Populate drawer items.
- Define actions when drawer items are clicked.
You will have two drawer items in this Flutter tutorial, one is messages and the other is settings. I am creating two screens so that I can navigate to them when the drawer items are pressed. Following is the messages screen.
import 'package:flutter/material.dart';


class Messages extends StatelessWidget {

  @override
  Widget build(BuildContext context) {
    return Main();
  }
}

/// This is the stateless widget that the main application instantiates.
class Main extends StatelessWidget {

  @override
  Widget build(BuildContext context) {
    return Scaffold(
      appBar: AppBar(
        title: Text('Messages'),
      ),
      body: Center(
        child: Text('See your messages here!')
      ),
    );
  }
}
Following is the settings screen.
import 'package:flutter/material.dart';


class Settings extends StatelessWidget {

  @override
  Widget build(BuildContext context) {
    return Main();
  }
}

/// This is the stateless widget that the main application instantiates.
class Main extends StatelessWidget {

  @override
  Widget build(BuildContext context) {
    return Scaffold(
      appBar: AppBar(
        title: Text('Settings'),
      ),
      body: Center(
        child: Text('Configure your settings here!')
      ),
    );
  }
}
Now, let’s come to our focal point- navigation drawer. As I mentioned earlier, you must have a Scaffold widget to incorporate the drawer. We use ListView as the child of the drawer so that we can easily scroll through when there are so many drawer items.
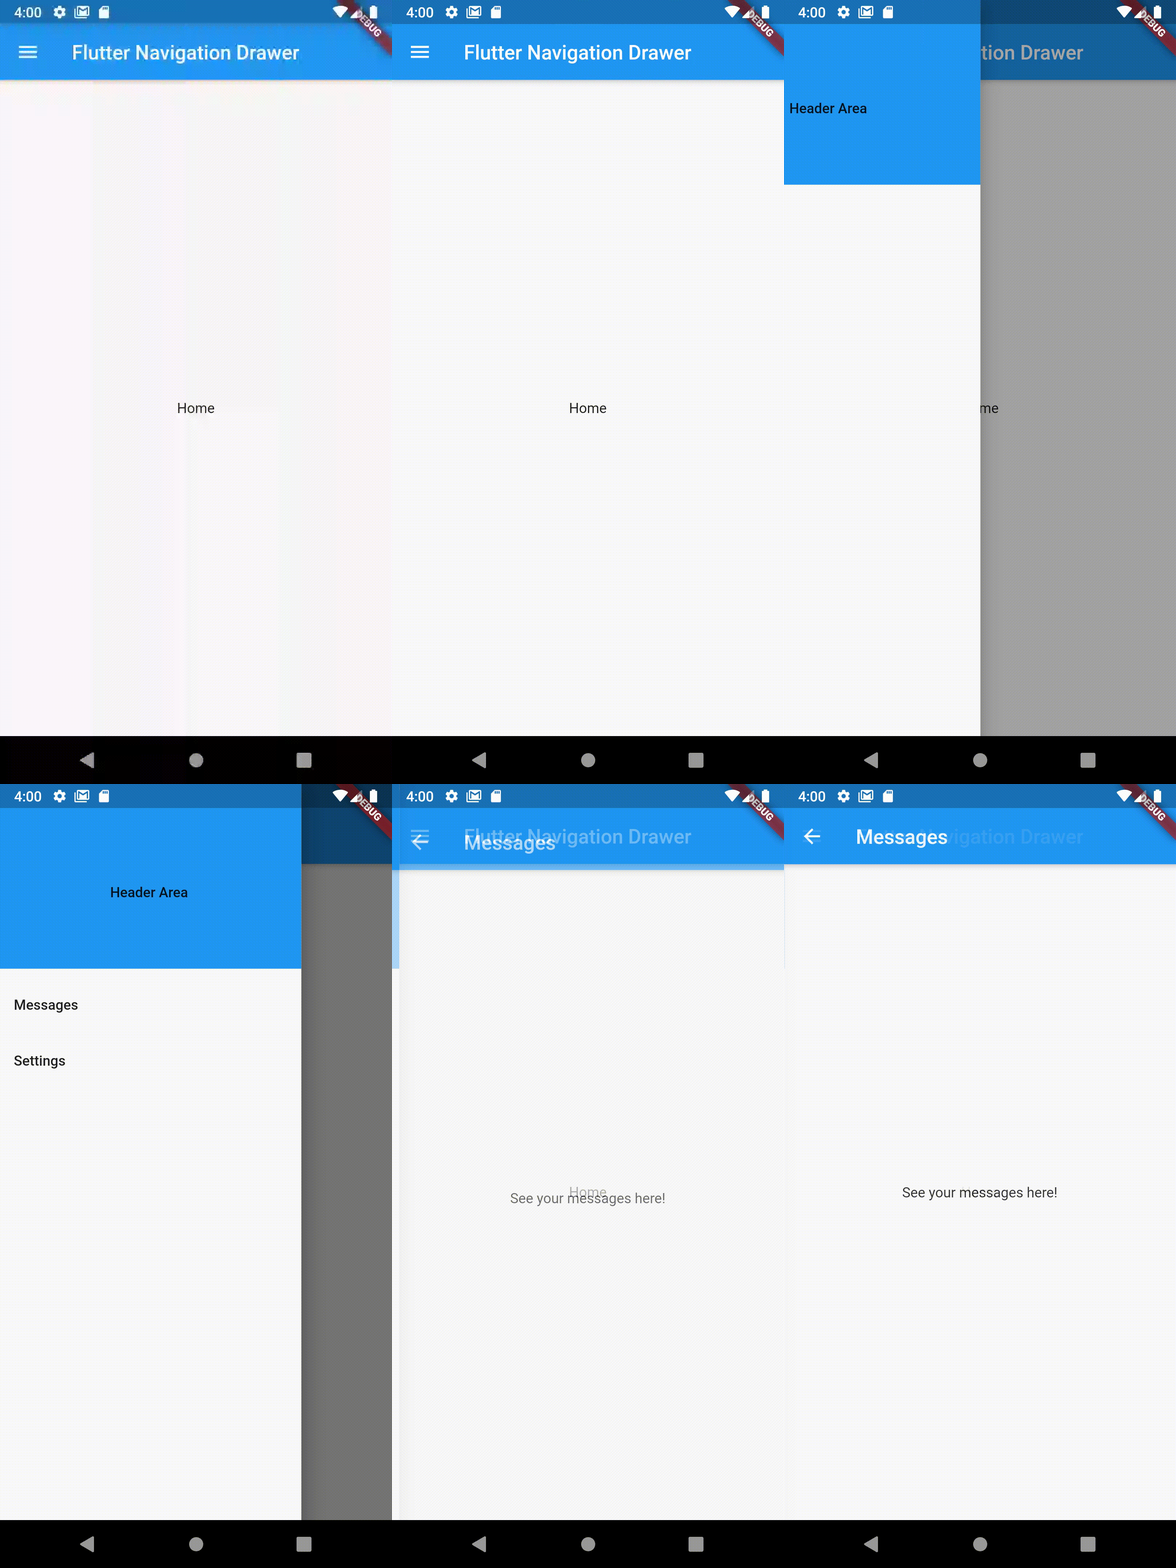
DrawerHeader widget is used to define the header content of the drawer whereas ListTile is used to create drawer items. We also defined routes so that we can navigate to specific screens when the drawer items are clicked.
Go through the complete Flutter navigation drawer example for better understanding.
import 'package:flutter/material.dart';
import 'package:flutter_navigation_drawer/messages.dart';
import 'package:flutter_navigation_drawer/settings.dart';

void main() => runApp(MyApp());

class MyApp extends StatelessWidget {

  @override
  Widget build(BuildContext context) {
    return MaterialApp(
      title: 'Flutter Tutorials',
      initialRoute: '/',
      routes: {
    // When navigating to the "/" route, build the Main widget.
    '/': (context) => Main(),
    '/messages': (context) => Messages(),
    '/settings': (context) => Settings()
  },
      // home: Main(),
    );
  }
}

class Main extends StatelessWidget {


  @override
  Widget build(BuildContext context) {
    return Scaffold(
      appBar: AppBar(title: Text('Flutter Navigation Drawer')),
      body: Center(child: Text('Home')),
      drawer: Drawer(
        // Add a ListView to the drawer. This ensures the user can scroll
        // through the options in the drawer if there isn't enough vertical
        // space to fit everything.
        child: ListView(
          // Important: Remove any padding from the ListView.
          padding: EdgeInsets.zero,
          children: <Widget>[
            DrawerHeader(
              child: Center(child:Text('Header Area')),
              decoration: BoxDecoration(
                color: Colors.blue,
              ),
            ),
            ListTile(
              title: Text('Messages'),
              onTap: () {
                Navigator.pop(context);
                Navigator.pushNamed(context, '/messages');
              },
            ),
            ListTile(
              title: Text('Settings'),
              onTap: () {
                Navigator.pop(context);
                Navigator.pushNamed(context, '/settings');
              },
            ),
          ],
        ),
      ),
    );
  }
}
Following is the output of the Flutter navigation drawer tutorial.

You can get the complete source code of this Flutter tutorial from this Github repository.


One Comment