How to Create Arrow Shape in SwiftUI
When developing an app’s UI, you might find yourself in need of various icons and shapes to guide your users. An arrow is a universally recognized symbol for direction or movement.
SwiftUI’s flexibility allows you to create a custom arrow shape and manipulate its direction with ease. Let’s explore how to build and rotate an arrow shape in SwiftUI.
Create a Custom Arrow Shape
SwiftUI doesn’t include a default arrow shape, but creating your own is straightforward. You’ll start by defining a new struct that conforms to the Shape protocol and implement the required path(in:) method.
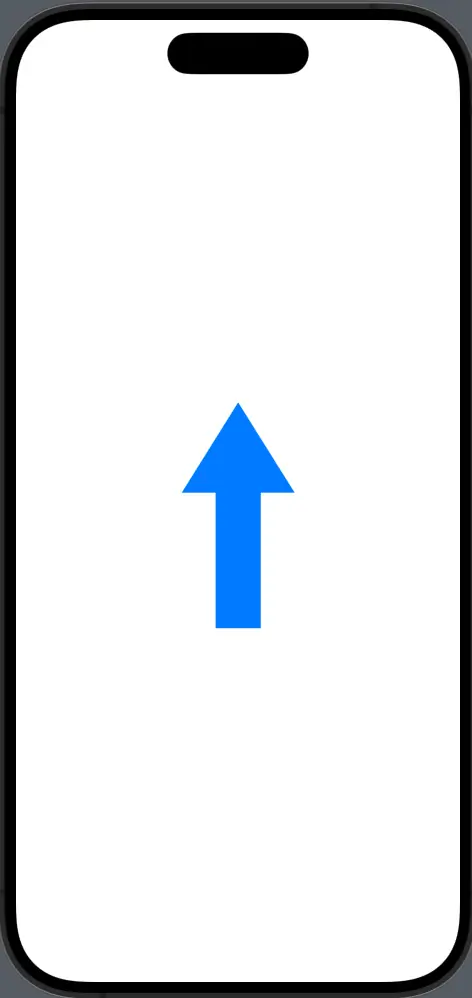
Here’s an example of how to create an upward-pointing arrow:
struct ArrowShape: Shape {
    func path(in rect: CGRect) -> Path {
        var path = Path()

        // Define the proportion of the arrowhead to the tail
        let arrowWidth = rect.width * 0.4
        let arrowHeight = rect.height * 0.6

        // Draw the arrow tail
        path.move(to: CGPoint(x: rect.midX - arrowWidth / 2, y: rect.maxY))
        path.addLine(to: CGPoint(x: rect.midX + arrowWidth / 2, y: rect.maxY))
        path.addLine(to: CGPoint(x: rect.midX + arrowWidth / 2, y: rect.maxY - arrowHeight))
        path.addLine(to: CGPoint(x: rect.maxX, y: rect.maxY - arrowHeight))

        // Draw the arrowhead
        path.addLine(to: CGPoint(x: rect.midX, y: rect.minY))
        path.addLine(to: CGPoint(x: rect.minX, y: rect.maxY - arrowHeight))
        path.addLine(to: CGPoint(x: rect.midX - arrowWidth / 2, y: rect.maxY - arrowHeight))

        // Complete the path by closing the shape
        path.closeSubpath()

        return path
    }
}
The ArrowShape struct uses a Path to draw an arrow pointing upwards. We calculate the points for the arrow based on the rect passed into the path(in:) method, which represents the frame of the shape.
Integrate the Arrow Shape into a View
You can now use your custom arrow shape in a SwiftUI view, like so:
struct ContentView: View {
    var body: some View {
        ArrowShape()
            .fill(Color.blue)
            .frame(width: 100, height: 200)
            .aspectRatio(1, contentMode: .fit)
    }
}
The ContentView struct creates an instance of ArrowShape, fills it with blue color, and constrains it within a frame. The aspectRatio modifier ensures that the shape scales proportionally.
Rotate the Arrow
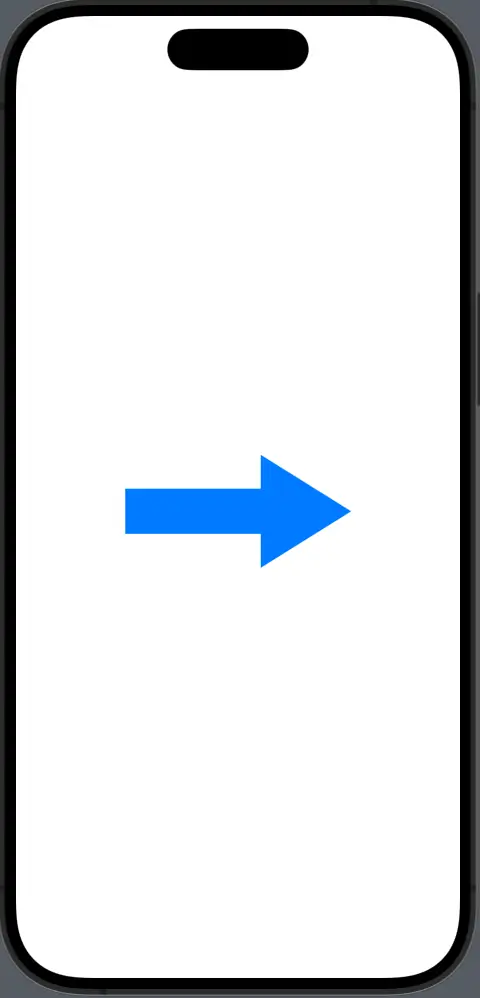
SwiftUI makes it simple to rotate shapes. You can add a .rotationEffect modifier to the arrow shape to change its direction. Here’s how you can make the arrow point to the right:
struct ContentView: View {
    var body: some View {
        ArrowShape()
            .fill(Color.blue)
            .frame(width: 100, height: 200)
            .rotationEffect(.degrees(90)) // Rotate 90 degrees to point right
            .aspectRatio(1, contentMode: .fit)
    }
}
The .rotationEffect modifier takes an Angle, and we use .degrees(90) to rotate the arrow 90 degrees clockwise.
Following is the complete code for reference.
import SwiftUI

struct ContentView: View {
    var body: some View {
        ArrowShape()
            .fill(Color.blue)
            .frame(width: 100, height: 200)
            .rotationEffect(.degrees(90)) // Rotate 90 degrees to point right
            .aspectRatio(1, contentMode: .fit)
    }
}

struct ArrowShape: Shape {
    func path(in rect: CGRect) -> Path {
        var path = Path()

        // Define the proportion of the arrowhead to the tail
        let arrowWidth = rect.width * 0.4
        let arrowHeight = rect.height * 0.6

        // Draw the arrow tail
        path.move(to: CGPoint(x: rect.midX - arrowWidth / 2, y: rect.maxY))
        path.addLine(to: CGPoint(x: rect.midX + arrowWidth / 2, y: rect.maxY))
        path.addLine(to: CGPoint(x: rect.midX + arrowWidth / 2, y: rect.maxY - arrowHeight))
        path.addLine(to: CGPoint(x: rect.maxX, y: rect.maxY - arrowHeight))

        // Draw the arrowhead
        path.addLine(to: CGPoint(x: rect.midX, y: rect.minY))
        path.addLine(to: CGPoint(x: rect.minX, y: rect.maxY - arrowHeight))
        path.addLine(to: CGPoint(x: rect.midX - arrowWidth / 2, y: rect.maxY - arrowHeight))

        // Complete the path by closing the shape
        path.closeSubpath()

        return path
    }
}

struct ContentView_Previews: PreviewProvider {
    static var previews: some View {
        ContentView()
    }
}
Change Arrow Direction Dynamically
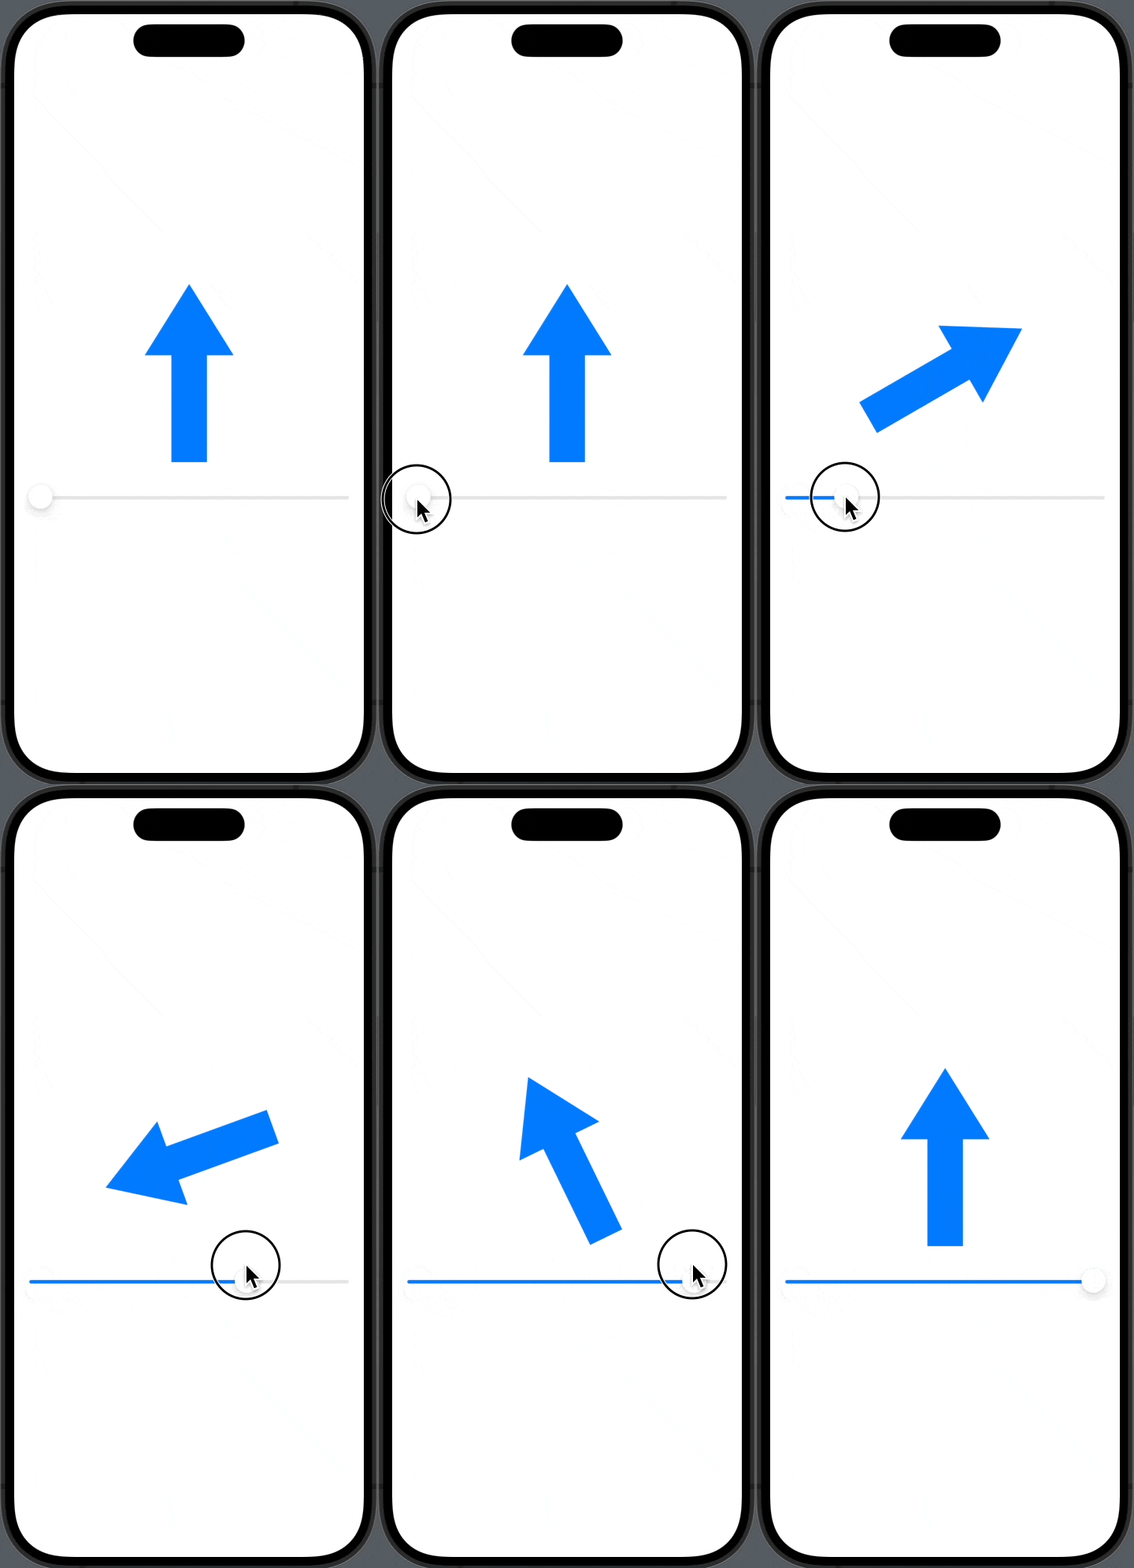
To change the direction dynamically, you can bind the rotation to a state variable and update it when needed.
import SwiftUI

struct ContentView: View {
    @State private var rotationDegrees: Double = 0

    var body: some View {
        VStack {
            ArrowShape()
                .fill(Color.blue)
                .frame(width: 100, height: 200)
                .rotationEffect(.degrees(rotationDegrees))
                .aspectRatio(1, contentMode: .fit)

            Slider(value: $rotationDegrees, in: 0...360, step: 1)
                .padding()
        }
    }
}

struct ArrowShape: Shape {
    func path(in rect: CGRect) -> Path {
        var path = Path()

        // Define the proportion of the arrowhead to the tail
        let arrowWidth = rect.width * 0.4
        let arrowHeight = rect.height * 0.6

        // Draw the arrow tail
        path.move(to: CGPoint(x: rect.midX - arrowWidth / 2, y: rect.maxY))
        path.addLine(to: CGPoint(x: rect.midX + arrowWidth / 2, y: rect.maxY))
        path.addLine(to: CGPoint(x: rect.midX + arrowWidth / 2, y: rect.maxY - arrowHeight))
        path.addLine(to: CGPoint(x: rect.maxX, y: rect.maxY - arrowHeight))

        // Draw the arrowhead
        path.addLine(to: CGPoint(x: rect.midX, y: rect.minY))
        path.addLine(to: CGPoint(x: rect.minX, y: rect.maxY - arrowHeight))
        path.addLine(to: CGPoint(x: rect.midX - arrowWidth / 2, y: rect.maxY - arrowHeight))

        // Complete the path by closing the shape
        path.closeSubpath()

        return path
    }
}

struct ContentView_Previews: PreviewProvider {
    static var previews: some View {
        ContentView()
    }
}
Adding a Slider allows users to adjust the rotationDegrees state, which in turn rotates the arrow.
Creating a custom arrow shape in SwiftUI is not just a lesson in drawing paths; it’s also an exercise in understanding how to transform and manipulate views. By mastering these techniques, you can craft intuitive and interactive interfaces with visual elements that are both functional and stylistically harmonious.
