How to create Custom Dialog in Flutter
AlertDialog in Flutter can be used to show alerts in Flutter. But it has some limitations and you can’t customize everything. In this Flutter tutorial, let’s learn how to create a custom dialog.
The AlertDialog widget is made from the Dialog class. Hence, you can create a custom alert using Dialog. It has various properties. Because of that, you can customize Dialog according to your requirements.
The code snippet is given below.
Dialog(
                    elevation: 0,
                    backgroundColor: Colors.green,
                    shape: RoundedRectangleBorder(
                        borderRadius: BorderRadius.circular(20.0)),
                    child: SizedBox(
                      height: 300,
                      width: 400,
                      child: Column(
                        mainAxisAlignment: MainAxisAlignment.spaceBetween,
                        children: [
                          const FlutterLogo(
                            size: 100,
                          ),
                          const Text(
                            "Custom Dialog Example in Flutter",
                            style: TextStyle(fontSize: 18, color: Colors.white),
                          ),
                          ElevatedButton(
                              onPressed: () {
                                Navigator.of(context).pop();
                              },
                              child: const Text("Okay"))
                        ],
                      ),
                    ),
                  )
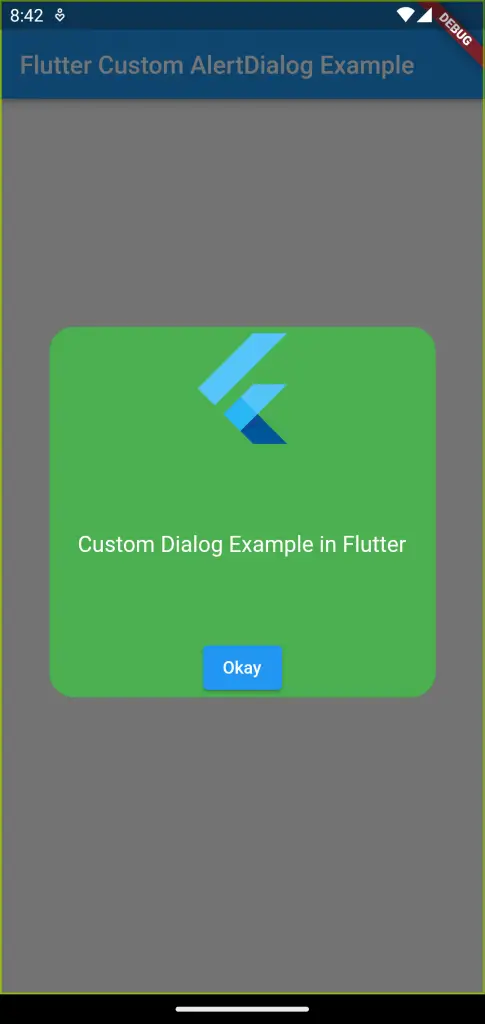
We customize the height and width of Dialog using SizedBox. Then we created a layout with the Column widget. We added the Flutter logo, Text, and a Button as children. We also changed the background color.
See the output given below.

Following is the complete code for reference. The Dialog appears when the TextButton is pressed. The dialog dismisses when the ElevatedButton is clicked.
import 'package:flutter/material.dart';

void main() {
  runApp(const MyApp());
}

class MyApp extends StatelessWidget {
  const MyApp({super.key});

  // This widget is the root of your application.
  @override
  Widget build(BuildContext context) {
    return MaterialApp(
      title: 'Flutter Demo',
      theme: ThemeData(
        primarySwatch: Colors.blue,
      ),
      home: const MyHomePage(),
    );
  }
}

class MyHomePage extends StatelessWidget {
  const MyHomePage({super.key});

  @override
  Widget build(BuildContext context) {
    return Scaffold(
        appBar: AppBar(
          title: const Text('Flutter Custom AlertDialog Example'),
        ),
        body: Center(
            child: TextButton(
          onPressed: () => showDialog<String>(
              context: context,
              builder: (BuildContext context) => Dialog(
                    elevation: 0,
                    backgroundColor: Colors.green,
                    shape: RoundedRectangleBorder(
                        borderRadius: BorderRadius.circular(20.0)),
                    child: SizedBox(
                      height: 300,
                      width: 400,
                      child: Column(
                        mainAxisAlignment: MainAxisAlignment.spaceBetween,
                        children: [
                          const FlutterLogo(
                            size: 100,
                          ),
                          const Text(
                            "Custom Dialog Example in Flutter",
                            style: TextStyle(fontSize: 18, color: Colors.white),
                          ),
                          ElevatedButton(
                              onPressed: () {
                                Navigator.of(context).pop();
                              },
                              child: const Text("Okay"))
                        ],
                      ),
                    ),
                  )),
          child: const Text('Show Dialog'),
        )));
  }
}
That’s how you create a custom alert using Dialog in Flutter.

